Build Your Own Heavy-Duty Garage Workbench for Under $200
Creating a custom garage workbench for under $200 involves designing a sturdy, personalized workspace using affordable materials and DIY techniques, perfect for any home improvement enthusiast.
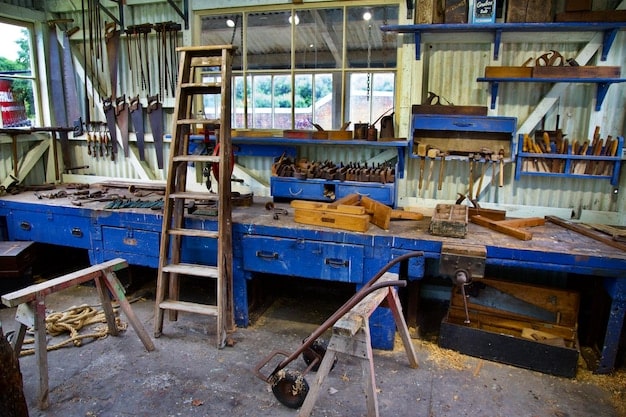
Looking to upgrade your garage with a functional and robust workbench without breaking the bank? You can create a custom garage workbench: design and build a heavy-duty workbench for under $200 and enhance your workspace today. By following a few simple steps and utilizing inexpensive materials, you can construct a workbench that meets all your needs while staying within budget.
Why Build Your Own Garage Workbench?
Building your own garage workbench not only saves you money but also allows you to customize the workbench to fit your specific needs and space. A DIY workbench is a great project for any handyman, providing both a practical workspace and a sense of accomplishment.
Cost Savings
Purchasing a pre-made workbench can be expensive. By building your own, you control the materials and can opt for more budget-friendly options. This ensures you get a sturdy workbench without overspending.
Customization
A DIY approach allows you to design the workbench to fit your specific garage layout and project requirements. You can choose the height, width, and depth, as well as add any custom features you need.
- Maximize space by choosing dimensions that fit your garage perfectly.
- Add custom shelving or drawers to store tools and materials.
- Adjust the height to ensure ergonomic comfort during long projects.
By creating a workbench tailored to your needs, you’ll have a more productive and enjoyable workspace.
Planning Your Garage Workbench Design
Before you start building, it’s essential to plan your workbench design. Consider the size, materials, and features you want to include. A well-thought-out plan will make the building process smoother and more efficient.
Choosing the Right Size
The size of your workbench should be determined by the available space in your garage and the types of projects you plan to undertake. Measure your garage and sketch out different sizes to find the best fit.
Selecting Materials
For a budget-friendly workbench, consider using common and affordable materials like lumber, plywood, and hardware. These materials can be easily sourced from your local home improvement store.
Essential Features to Include
Think about what features will make your workbench more functional. Common features include a sturdy work surface, shelving, drawers, and a pegboard for tool storage. Plan these features into your design from the start.
- Shelves for organizing tools and materials.
- Drawers for storing small parts and accessories.
- Pegboard to hang frequently used tools within easy reach.
Careful planning ensures your workbench meets all your project needs.
Gathering Your Materials and Tools
Once you have a design, it’s time to gather the necessary materials and tools. Keeping a list will help ensure you don’t forget anything, making the building process more efficient.
Materials List
Create a detailed list of all the materials you’ll need, including lumber, plywood, screws, nails, and any additional hardware. Double-check your list to ensure you have everything before starting.
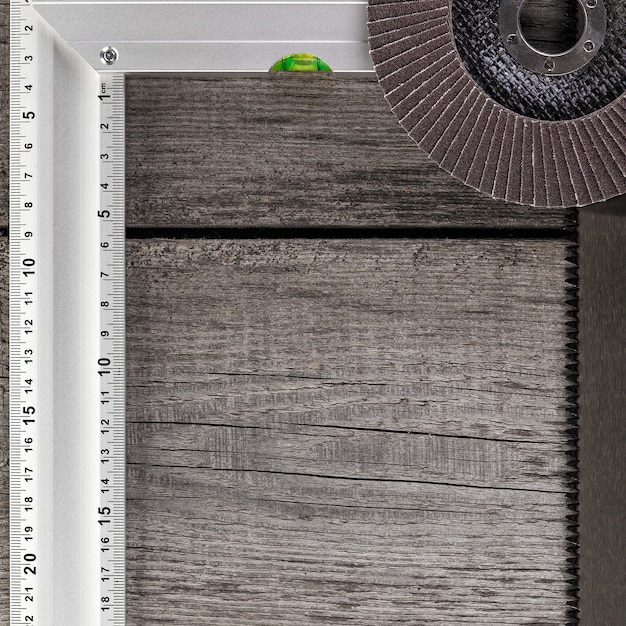
Essential Tools
You’ll need a basic set of tools to build your workbench, including a saw, drill, screwdriver, measuring tape, and level. Gather these tools ahead of time to avoid delays during the build.
Budget Considerations
Keep a close eye on your budget as you gather materials and tools. Look for cost-effective alternatives and consider borrowing tools if possible. This will help you stay within your $200 budget.
- Compare prices at different stores to find the best deals on lumber and hardware.
- Consider using reclaimed wood to save on material costs.
- Borrow tools from friends or family if you don’t already own them.
Staying organized and mindful of your budget will ensure you get the most out of your project.
Step-by-Step Guide to Building Your Workbench
With your plan, materials, and tools ready, it’s time to start building. Follow these step-by-step instructions to construct your heavy-duty garage workbench.
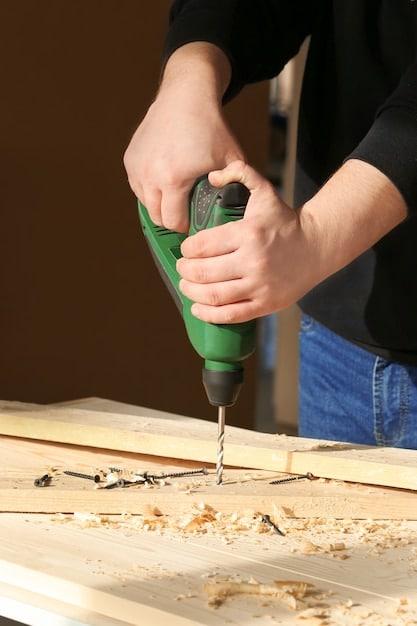
Building the Frame
Start by building the frame of your workbench. Cut the lumber to the specified lengths and assemble the frame using screws and nails. Ensure the frame is square and sturdy for optimal support.
Creating the Work Surface
Next, create the work surface by attaching plywood to the frame. Secure the plywood with screws, ensuring it is flush and even. This will provide a smooth and durable surface for your projects.
Adding Shelves and Drawers
If your design includes shelves and drawers, now is the time to add them. Build the shelves and drawers separately and then attach them to the frame. Ensure they are securely fastened and can handle the weight of your tools and materials.
- Measure and cut the shelving supports accurately.
- Use drawer slides for smooth operation.
- Reinforce shelves to handle heavy loads.
Following these steps ensures a robust and functional workbench.
Finishing and Customizing Your Workbench
Once the basic structure is complete, it’s time to finish and customize your workbench. This step allows you to personalize the workbench to match your preferences and further enhance its functionality.
Sanding and Sealing
Sand the entire workbench to smooth out any rough edges or splinters. Then, apply a sealant or finish to protect the wood from moisture and wear. This will prolong the life of your workbench.
Adding a Vise or Clamps
Consider adding a vise or clamps to your workbench to hold materials securely in place while you work. These accessories can greatly improve your efficiency and safety.
Organizing Your Tools
Organize your tools by using pegboards, shelves, and drawers. This will make it easier to find what you need and keep your workspace tidy. A well-organized workbench improves productivity.
- Install a pegboard for hanging tools.
- Use drawer organizers to keep small parts separated.
- Label shelves and drawers for easy identification.
The finishing touches can make your workbench truly your own, tailored to your specific project needs. A few final customizations can transform your workbench from a simple structure to a highly functional workspace.
Maintaining Your Garage Workbench
Proper maintenance will keep your garage workbench in good condition for years to come. Regular cleaning and occasional repairs will ensure it remains a reliable workspace.
Regular Cleaning
Clean your workbench regularly to remove dust, dirt, and debris. This will prevent buildup and keep your workspace tidy. A clean workbench is a safer and more enjoyable workspace.
Repairing Damage
Inspect your workbench regularly for any signs of damage, such as cracks, loose screws, or warped wood. Repair any damage promptly to prevent it from worsening and compromising the stability of the workbench.
Extending Its Life
Protect your workbench from moisture and extreme temperatures to extend its life. Consider covering it when not in use and storing it in a dry environment.
- Use a waterproof cover when the workbench is not in use.
- Apply sealant annually to protect the wood.
- Tighten screws and bolts regularly to maintain stability.
With proper care, your DIY garage workbench will be a valuable asset for years.
| Key Point | Brief Description |
|---|---|
| 🛠️ Design Planning | Plan size, materials, and features to fit your garage and projects. |
| 💰 Budget-Friendly Materials | Use affordable lumber, plywood, and hardware from local stores. |
| 🔨 Step-by-Step Building | Build frame, add work surface, and incorporate shelves/drawers as planned. |
| 🧰 Maintenance | Regularly clean, inspect, and repair damages to extend the workbench lifespan. |
FAQ
▼
Affordable options include common lumber like 2x4s for the frame and plywood for the work surface. These materials are readily available at most home improvement stores and provide a good balance of cost and durability.
▼
Consider adding a vise for holding materials, a dog hole system for woodworking, or integrated power outlets for convenience. Shelves and drawers can also be customized to fit your specific tool storage needs.
▼
Essential tools include a circular saw or hand saw for cutting wood, a drill for driving screws, a measuring tape, a level, and safety glasses. A square is also helpful to ensure accurate angles.
▼
Use strong joinery techniques like screws and glue, ensure all corners are square, and add bracing to the frame. A solid foundation and sturdy legs are also crucial for stability during heavy use.
▼
Always wear safety glasses to protect your eyes, use hearing protection when operating power tools, and wear gloves to protect your hands. Work in a well-ventilated area and be mindful of proper tool operation techniques.
Conclusion
Building a custom garage workbench for under $200 is an achievable and rewarding project. By carefully planning, choosing affordable materials, and following step-by-step instructions, you can create a sturdy and functional workspace that enhances your garage and supports your DIY endeavors. Enjoy your new, personalized workbench!


