Build a Custom Bookshelf: A Weekend DIY Project

Build a Custom Bookshelf: Design and Construct a Wall-Mounted Bookshelf in a Weekend involves careful planning, selecting the right materials like lumber and hardware, precise cutting and assembly, and secure wall mounting to create a functional and aesthetically pleasing storage solution.
Looking to add some personalized storage to your home? You can build a custom bookshelf: design and construct a wall-mounted bookshelf in a weekend, transforming your space and showcasing your DIY skills with a functional and stylish addition.
Planning Your Wall-Mounted Bookshelf
Before diving into the construction process, thorough planning is essential for a successful outcome. Careful consideration of your space, material choices, and design preferences will set the stage for a custom bookshelf that perfectly fits your needs and aesthetics.
Assessing Your Space
Begin by evaluating the wall where you intend to mount the bookshelf. Measure the available width and height to determine the maximum dimensions of your bookshelf. Consider the wall’s structural integrity, identifying stud locations for secure mounting. Also, factor in any obstacles such as electrical outlets or light switches that may impact your design.
Choosing the Right Materials
Selecting the right materials is critical for both the aesthetics and durability of your bookshelf. Common wood choices include pine, oak, and plywood, each offering different levels of strength, grain patterns, and cost. Consider using hardwoods for a more refined look or plywood for a cost-effective option. Gather necessary hardware such as screws, anchors, and brackets that will support the weight of your books and decorative items.
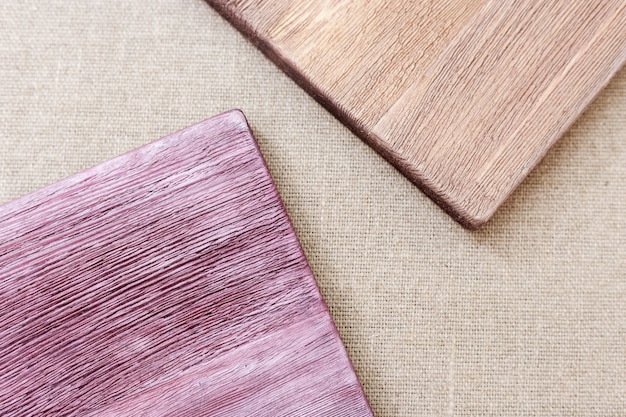
Here are key considerations for material selection:
- Wood Type: Choose between pine, oak, plywood, or other hardwoods based on appearance and durability.
- Hardware: Select sturdy screws, anchors, and brackets suitable for wall mounting.
- Finish: Decide on paint, stain, or varnish to match your existing décor.
Proper planning ensures that your wall-mounted bookshelf is not only aesthetically pleasing but also structurally sound and functional for your intended purpose, setting the foundation for a rewarding DIY project.
Gathering the Necessary Tools and Supplies
Having the right tools and supplies readily available will streamline the construction process and ensure a smooth and efficient weekend project. Preparing your workspace and gathering all necessary items in advance will minimize delays and allow you to focus on creating your custom bookshelf.
Essential Tools for Woodworking
A well-equipped workspace is crucial for any woodworking project. Essential tools include a measuring tape, level, square, saw (circular or hand saw), drill, screwdriver, sandpaper, and safety glasses. Additional tools such as a stud finder, clamps, and a router can further enhance precision and versatility.
Required Supplies
In addition to tools, you’ll need specific supplies to complete your wall-mounted bookshelf. These include lumber (pre-cut or in sheets), screws, wood glue, anchors, brackets, sandpaper, paint or stain, sealant, and safety gear. Having these supplies organized and within reach will save time and prevent interruptions during construction.
Here’s a practical checklist of tools and supplies:
- Measuring tape, level, square
- Saw (circular or hand saw)
- Drill and screwdriver
- Lumber, screws, wood glue
- Anchors and brackets
By gathering all necessary tools and supplies beforehand, you’ll be well-prepared to tackle the project and enjoy a seamless woodworking experience, resulting in a beautifully crafted wall-mounted bookshelf.
Cutting the Lumber to Size
Accurate cutting of the lumber is crucial for achieving a professional-looking bookshelf. Precise measurements and careful cutting techniques will ensure that all components fit together seamlessly, resulting in a structurally sound and visually appealing finished product. Proper safety precautions should always be observed during this process.
Measuring and Marking
Start by carefully measuring and marking the lumber according to your design specifications. Use a measuring tape, square, and pencil to create precise cutting lines. Double-check all measurements to avoid errors that could compromise the integrity of the bookshelf. Accurate measurements are the foundation of a successful woodworking project.
Cutting Techniques
Employ appropriate cutting techniques based on the tools available to you. A circular saw is ideal for making straight cuts, while a hand saw offers more control for intricate cuts. Use a saw guide or clamp to ensure accuracy and prevent splintering. Take your time and maintain a steady hand for clean and precise cuts. Remember to always wear safety glasses.
Key steps for accurate lumber cutting:
- Measure and mark accurately with a square and pencil.
- Use a circular saw or hand saw based on the cut type.
- Employ a saw guide or clamp for precision.
By paying close attention to detail and using proper cutting techniques, you’ll create perfectly sized components that fit together seamlessly, forming the foundation of your custom wall-mounted bookshelf.
Assembling the Bookshelf Components
Assembling the bookshelf components is where the individual pieces come together to form the structure of your custom creation. Careful alignment, secure fastening, and attention to detail will ensure a sturdy and visually appealing finished product.
Joining the Pieces
Begin by joining the sides, top, bottom, and shelves of the bookshelf using wood glue and screws. Apply glue to all mating surfaces before securing them with screws for a strong and durable bond. Use clamps to hold the pieces together while the glue dries.
Reinforcing the Structure
Consider adding corner braces or additional supports to reinforce the structure of your bookshelf. These reinforcements provide extra stability and prevent sagging, particularly for larger or heavily loaded shelves. Reinforce any joints or areas that may be prone to stress. Proper reinforcement ensures that your bookshelf will withstand the test of time.
Important factors for successful assembly:
- Use wood glue and screws for a strong bond.
- Clamp the pieces together while the glue dries.
- Reinforce corners and stress points with braces.
By carefully joining the pieces, reinforcing the structure, and paying attention to detail, you’ll create a solid and well-constructed bookshelf that will proudly display your books and decorative items for years to come.
Finishing and Painting Your Bookshelf
Finishing and painting your bookshelf is the final step in transforming it from a functional structure into a polished and personalized piece of furniture. Proper surface preparation, thoughtful color selection, and careful application of paint or stain will enhance the beauty and durability of your bookshelf.
Surface Preparation
Before applying any finish, prepare the surface by sanding it smooth with progressively finer grits of sandpaper. Remove any imperfections, such as scratches or dents, and ensure that all surfaces are clean and free of dust. A smooth and clean substrate is essential for achieving a professional-looking finish.
Painting or Staining
Choose a paint or stain that complements your existing décor and reflects your personal style. Apply the finish in thin, even coats, allowing each coat to dry completely before applying the next. Use a high-quality brush or sprayer for a smooth and consistent application. Consider applying a clear sealant to protect the finish and enhance its durability.
Essential tips for a great finish:
- Sand the surface smooth and clean before finishing.
- Apply thin, even coats of paint or stain.
- Use a clear sealant for added protection.
With careful preparation, thoughtful color selection, and meticulous application techniques, you’ll achieve a flawless finish that enhances the beauty and longevity of your custom wall-mounted bookshelf.
Mounting the Bookshelf to the Wall
Securely mounting the bookshelf to the wall is the final and crucial step in ensuring its stability and safety. Proper wall anchoring techniques and careful installation will guarantee that your bookshelf will stand strong and support the weight of your books and decorative items for years to come.
Finding Wall Studs
Locate the wall studs using a stud finder and mark their positions. Wall studs provide the strongest support for mounting heavy objects. If studs are not available in the desired location, use appropriate wall anchors to distribute the weight evenly. Secure mounting is essential for preventing accidents and ensuring the longevity of your bookshelf.
Attaching the Bookshelf
Attach the bookshelf to the wall using screws and brackets. Align the bookshelf, ensuring it is level, and drive the screws through the brackets and into the wall studs or anchors. Use appropriate screw lengths and anchors based on the weight capacity required. Double-check that the bookshelf is securely fastened and can support the intended load.
Key steps for secure wall mounting:
- Locate wall studs for maximum support.
- Use appropriate screws and anchors for the weight.
- Ensure the bookshelf is level and securely fastened.
By carefully finding wall studs, selecting appropriate hardware, and securely attaching the bookshelf to the wall, you’ll create a safe and stable storage solution that will enhance the beauty and functionality of your living space.
| Key Point | Brief Description |
|---|---|
| 📐 Measure Accurately | Ensure precise cuts by measuring twice and cutting once to avoid errors. |
| 🛠️ Select Sturdy Materials | Choose quality lumber and hardware for durability and longevity of bookshelf. |
| 🔒 Secure Wall Mounting | Use wall studs and appropriate anchors for safe and stable installation. |
| 🎨 Finishing Touches | Sand, paint, or stain for aesthetic appeal and protect the wood. |
Frequently Asked Questions
▼
Essential tools include a measuring tape, level, saw, drill, screwdriver, sandpaper, and safety glasses. Clamps and a stud finder can also be very helpful.
▼
Pine is a cost-effective option, while oak provides a more refined look. Plywood is also suitable for a budget-friendly and durable option for bookshelf construction.
▼
Use a stud finder to locate wall studs. Mark their positions to provide the strongest support when mounting your bookshelf, ensuring it is safe and stable.
▼
Yes, you can customize your bookshelf by painting or staining it. Sand the surface smooth first, then apply thin, even coats to achieve a professional finish.
▼
Use a level when mounting the bookshelf to the wall. Adjust as needed to ensure it is perfectly level before fully securing the screws and brackets.
Conclusion
Building a custom wall-mounted bookshelf in a weekend is an achievable and rewarding DIY project. With careful planning, the right tools, and attention to detail, you can create a functional and stylish storage solution that enhances any room in your home.

