Power Your Shed: Install a Solar Panel Kit for $300
Installing a solar-powered shed with a $300 solar panel kit is a cost-effective and eco-friendly DIY project, that provides electricity for lighting, tools, and other uses, transforming your backyard shed into a functional and sustainable space.
Ready to ditch the extension cords and embrace sustainable energy in your backyard? Installing a solar-powered shed with a $300 solar panel kit is an achievable DIY project that can bring power to your tools, lights, and more.
Getting Started with Your Solar Shed Project
Embarking on a DIY solar panel installation for your shed can seem daunting at first. However, with careful planning and the right approach, this project can be both rewarding and budget-friendly. The initial step involves assessing your power needs and selecting a suitable solar panel kit.
Before diving into the installation process, consider the shed’s location, sun exposure, and your specific energy requirements. With a $300 budget, you can effectively power lights, small appliances, and charging stations within your shed.
Assessing Your Power Needs
Determining how much power you need is crucial for choosing the right solar panel kit. Consider what you plan to power in your shed and for how long.
Choosing the Right Solar Panel Kit
A $300 budget can get you a decent solar panel kit suitable for small to medium-sized sheds. Look for kits that include a solar panel, charge controller, wiring, and mounting hardware.
- Panel Wattage: Choose a panel with sufficient wattage to meet your energy needs.
- Charge Controller: A charge controller protects your battery from overcharging.
- Wiring and Connectors: Ensure the kit includes necessary wiring and connectors.
By carefully assessing your power needs and selecting the right solar panel kit, you can confidently begin your solar shed project. This initial planning phase sets the stage for a successful and efficient installation process.
Essential Tools and Materials for Installation
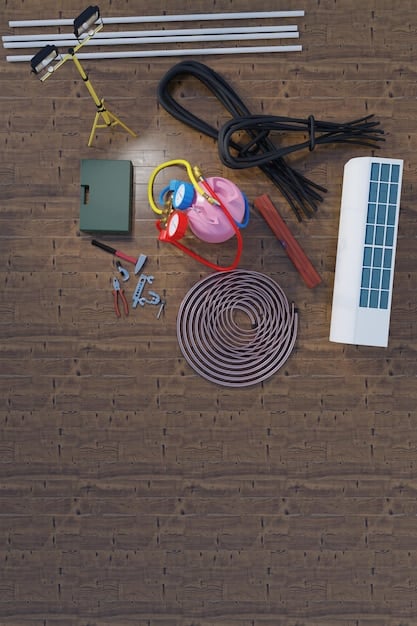
Before you start the physical installation, gathering the necessary tools and materials is essential for a smooth process. A well-prepared toolkit ensures efficiency and safety throughout the project. Let’s delve into the key tools and materials you’ll need to bring your solar-powered shed to life.
Having the right tools not only makes the installation process easier but also guarantees a secure and long-lasting setup. Here are some of the must-have items for your solar shed project.
Basic Toolkit
A basic toolkit should include items like a screwdriver set, wire stripper, pliers, and a measuring tape. These tools are fundamental for various tasks during the installation.
Safety Gear
Safety should always be a top priority. Equip yourself with safety glasses, gloves, and a voltage tester to prevent accidents and ensure a safe working environment.
- Drill: A drill is essential for mounting the solar panel securely on the shed roof.
- Wrench Set: Wrenches are needed to tighten bolts and nuts during the mounting process.
- Ladder: A sturdy ladder will provide safe access to the shed roof.
By equipping yourself with these essential tools and materials, you’ll be well-prepared to tackle the installation process with confidence and ensure a successful solar shed setup.
Mounting the Solar Panel: Step-by-Step Guide
Mounting the solar panel is a critical step in your DIY solar shed project. Proper installation ensures optimal sunlight exposure and stability for your panel. This section provides a step-by-step guide to help you securely mount your solar panel.
Before you start, it’s crucial to carefully plan the panel’s location, angle, and mounting method. Ensure that the panel is positioned to receive maximum sunlight throughout the day.
Preparing the Mounting Surface
Before mounting the panel, inspect the shed roof for any damage or weak spots. Reinforce the area if necessary to provide a stable base for the solar panel.
Securing the Panel
Use appropriate mounting brackets and hardware to securely attach the solar panel to the shed roof. Follow the manufacturer’s instructions for proper installation techniques.
Once the panel is securely mounted, take a moment to admire your work and appreciate the progress you’ve made in creating your solar-powered shed. With the panel in place, you’re one step closer to harnessing the power of the sun.
Wiring and Electrical Connections
Connecting the solar panel to the charge controller and battery requires careful wiring and electrical connections. This step is crucial for safely and efficiently harnessing the energy generated by the solar panel. Let’s walk through the process step by step.
Before you begin, it’s essential to understand the basic principles of electrical wiring and safety precautions. Ensure that you have the necessary knowledge and skills to handle electrical connections safely.
Connecting the Solar Panel to the Charge Controller
Connect the positive (+) and negative (-) wires from the solar panel to the corresponding terminals on the charge controller. Ensure that the connections are secure and properly insulated.
Connecting the Charge Controller to the Battery
Connect the positive (+) and negative (-) wires from the charge controller to the corresponding terminals on the battery. Again, ensure that the connections are secure and properly insulated.
- Double-Check Wiring: Before proceeding, double-check all wiring connections to ensure they are correct and secure.
- Use Appropriate Wire Gauges: Use the correct wire gauges to handle the current and voltage safely.
- Insulate Connections: Properly insulate all connections to prevent shorts and electrical hazards.
Completing the wiring and electrical connections with care and attention to detail is crucial for the safe and efficient operation of your solar-powered shed. Take your time, follow safety precautions, and double-check your work to ensure a reliable setup.
Testing and Troubleshooting Your Solar Shed System
Once your solar shed system is installed, testing and troubleshooting are essential to ensure everything is working correctly. This section will guide you through the process of verifying the functionality and addressing any potential issues.
Before you start testing, it’s a good idea to review all the wiring connections and components to make sure everything is properly connected. This will help you identify any obvious errors before you begin your tests.
Checking Voltage and Current
Use a multimeter to check the voltage and current readings at various points in the system. This will help you verify that the solar panel is generating power, the charge controller is working correctly, and the battery is charging.
Troubleshooting Common Issues
If you encounter any problems during testing, such as low voltage or no charging, troubleshoot the system by checking for loose connections, damaged wiring, or faulty components. Consult the manufacturer’s documentation for specific troubleshooting steps.
By carefully testing and troubleshooting your solar shed system, you can ensure that everything is working as expected and that you’re getting the most out of your investment. This proactive approach will help you identify and address any potential issues before they become major problems.
Maintenance and Long-Term Care
Proper maintenance and long-term care are essential for maximizing the lifespan and performance of your solar shed system. This section provides guidance on how to keep your system running smoothly for years to come.
Regular maintenance not only ensures optimal performance but also helps prevent costly repairs and replacements down the road. By following a few simple steps, you can keep your solar shed system in top condition.
Cleaning the Solar Panel
Regularly clean the surface of the solar panel to remove dirt, dust, and debris that can reduce its efficiency. Use a soft cloth and mild detergent to gently clean the panel without scratching it.
Checking Wiring and Connections
Periodically inspect the wiring and connections for any signs of damage or corrosion. Tighten any loose connections and replace any damaged wiring to prevent electrical hazards.
- Battery Maintenance: Check the battery regularly to ensure it is properly charged and maintained.
- Component Inspection: Inspect all components, including the charge controller and mounting hardware, for any signs of wear and tear.
- Monitor Performance: Keep an eye on the system’s performance over time to detect any changes in output or efficiency.
By following these maintenance and long-term care tips, you can ensure that your solar shed system continues to provide reliable and sustainable power for years to come. Regular maintenance not only protects your investment but also helps you contribute to a cleaner and more sustainable future.
| Key Point | Brief Description |
|---|---|
| 💡 Power Needs | Assess energy consumption for lights and tools. |
| 🛠️ Essential Tools | Gather screwdrivers, wire strippers, and safety gear. |
| ☀️ Panel Mounting | Securely attach the panel for maximum sunlight. |
| 🔋 Wiring | Connect panel to charge controller and battery safely. |
FAQ
▼
The size of the solar panel depends on your power needs. Calculate the total wattage of all devices you plan to power and choose a panel that meets or exceeds that amount.
▼
With proper planning and the right tools, installing a solar panel on a shed roof is a manageable DIY project. Follow the manufacturer’s instructions and take necessary safety precautions.
▼
A basic solar panel kit for a shed can cost around $300, including the panel, charge controller, and wiring. Additional costs may include mounting hardware and batteries.
▼
Solar-powered sheds offer several benefits, including reduced energy costs, environmental sustainability, and the convenience of having power in remote locations without running extension cords.
▼
Regular maintenance includes cleaning the solar panel, checking wiring connections, and ensuring the battery is properly charged. Inspect the components periodically for any signs of wear and tear.
Conclusion
Installing a solar-powered shed with a $300 solar panel kit is a fantastic way to bring sustainable energy to your backyard projects. By carefully planning, following safety precautions, and performing regular maintenance, you can enjoy the benefits of a functional and eco-friendly shed for years to come.


