Build a Compost Bin: The Ultimate DIY Guide
Build a Compost Bin: Construct a Three-Bin Composting System for Efficient Waste Management involves creating a structured composting system, typically from wood, to efficiently break down organic waste into nutrient-rich soil, reducing landfill waste and benefiting your garden.
Want to reduce waste and enrich your garden? Learn how to Build a Compost Bin: Construct a Three-Bin Composting System for Efficient Waste Management, a rewarding and environmentally friendly DIY project you can tackle this weekend!
Why Build a Three-Bin Composting System?
Building a three-bin composting system offers numerous benefits for both your garden and the environment. It’s a practical and sustainable way to manage your organic waste and create nutrient-rich compost for your plants.
Benefits of Composting
Composting is a natural recycling process that transforms kitchen scraps and yard waste into a valuable soil amendment.
- Reduces landfill waste and methane emissions.
- Enriches soil with essential nutrients.
- Improves soil structure and water retention.
- Suppresses plant diseases and pests.
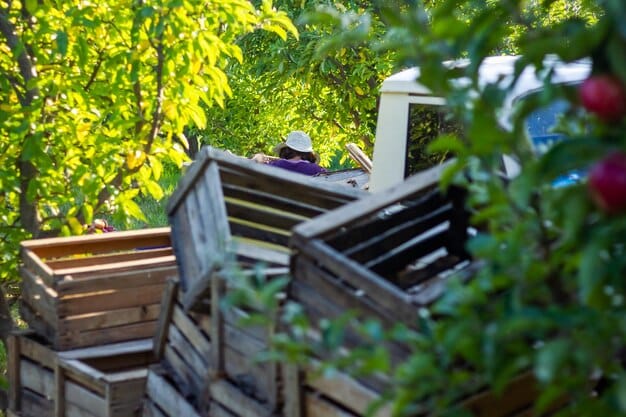
Why Three Bins?
A three-bin system allows for efficient composting management, enabling continuous composting and easier turning.
- First bin: Actively composting materials.
- Second bin: Partially decomposed materials.
- Third bin: Curing and ready-to-use compost.
Having three separate bins ensures that you always have space for new materials while allowing the older compost to mature properly. This also simplifies the process of turning and aerating the compost, which is crucial for efficient decomposition. By understanding the benefits of composting and the advantages of a three-bin system, you can create a sustainable and productive gardening practice.
Planning Your Compost Bin System
Before you start building, careful planning is essential to ensure your compost bin system meets your needs and space requirements. Consider the location, size, and materials you’ll need.
Choosing the Right Location
Select a location that is convenient, accessible, and provides adequate drainage and sunlight.
- Ensure the location is level and has good drainage to prevent waterlogging.
- Choose a spot that receives partial sunlight to help heat up the compost pile.
- Make sure it’s easily accessible from your house and garden.
Determining the Size
The size of your compost bins will depend on the amount of organic waste you generate and the space available.
- A general guideline is 3ft x 3ft x 3ft per bin, but adjust as needed.
- Consider the volume of yard waste and kitchen scraps you produce weekly.
- Ensure you have enough space to easily turn and manage the compost.
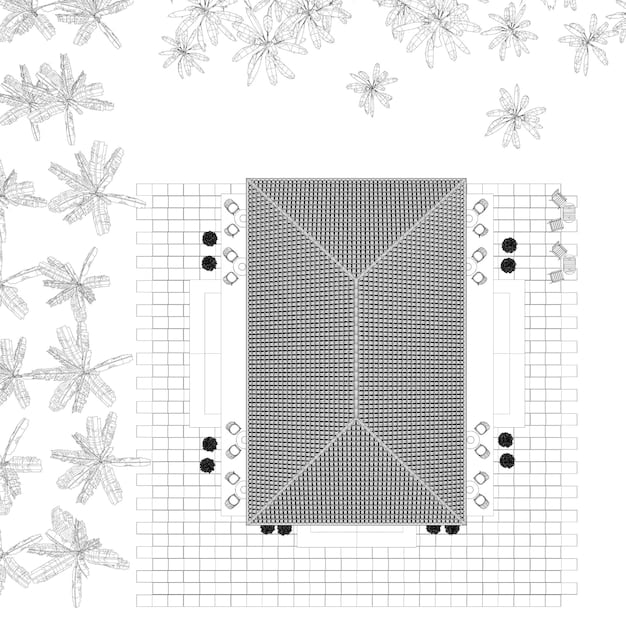
Planning your composting system involves not only selecting the right location and determining the appropriate size but also considering the materials you’ll use and the tools you’ll need. By carefully planning these aspects, you can create an efficient and sustainable composting system that meets your specific needs. A well-planned system ensures ease of use and optimal compost production, contributing to a healthier garden and a more environmentally friendly lifestyle.
Gathering Materials and Tools
Once you have a plan, it’s time to gather the necessary materials and tools to construct your three-bin composting system. Here’s a comprehensive list to help you prepare:
Materials List
The materials you’ll need will primarily depend on the construction method you choose, but here’s a general list:
- Untreated lumber (cedar or redwood are excellent choices for durability)
- Hardware cloth or chicken wire (for ventilation and pest control)
- Screws or nails
- Hinges (for access doors)
- Latches or hooks (to secure the doors)
Tools Needed
Having the right tools will make the construction process smoother and more efficient.
- Saw (circular saw or hand saw)
- Drill with various drill bits
- Measuring tape
- Level
- Hammer
- Staple gun (for attaching hardware cloth)
- Safety glasses and gloves
Proper preparation with the right materials and tools is crucial for a successful build. Ensure you have everything on hand before you begin construction to avoid unnecessary delays and frustration. This approach ensures a smooth and efficient process, resulting in a durable and functional three-bin composting system.
Constructing the First Bin
Building the first bin is the foundation of your composting system. Follow these steps to ensure a sturdy and functional structure:
Cutting the Lumber
Measure and cut the lumber according to your plan. Accuracy is key to a well-built bin.
Start by cutting the side, front, and back pieces to the correct length. Ensure the cuts are straight and even for a professional look. Use a circular saw for faster and more accurate cuts.
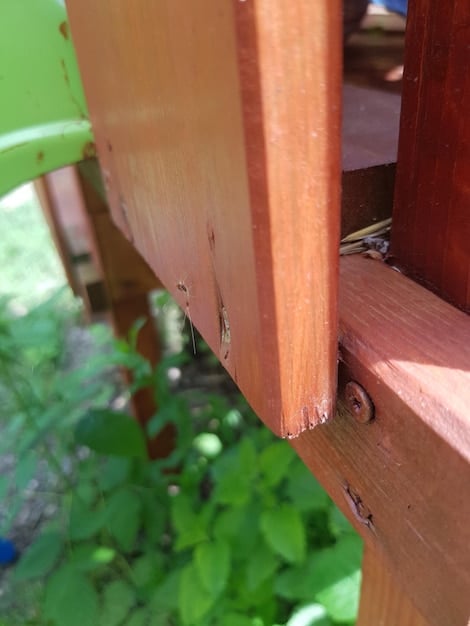
Assembling the Frame
Assemble the frame using screws or nails. Ensure the corners are square and the structure is sturdy.
Attach the side pieces to the front and back pieces, creating a rectangular frame. Use a level to ensure the frame is square. Reinforce the corners with additional screws or nails for added stability. Secure the bottom frame pieces. Add support braces to the frame for increased strength. This step is vital to prevent the bin from warping or collapsing under the weight of the compost.
Adding Ventilation
Install hardware cloth or chicken wire on the sides and bottom for ventilation and pest control.
Cut the hardware cloth to the appropriate size and attach it to the inside of the frame using a staple gun. Make sure the edges are securely fastened to prevent pests from entering. Ventilation is critical for maintaining the right moisture and oxygen levels inside the bin, promoting faster and more efficient composting. A well-ventilated bin helps prevent anaerobic conditions, which can lead to foul odors.
Constructing the first bin carefully and accurately sets the stage for the rest of the system. Paying attention to detail during this stage ensures a robust and efficient composting structure. A solid foundation is crucial for a successful composting process, providing the necessary support and ventilation for optimal decomposition.
Building the Remaining Bins
Once the first bin is complete, building the remaining bins follows a similar process. Consistency in construction ensures a uniform and functional composting system.
Repeating the Process
Follow the same steps as with the first bin to construct the second and third bins.
Accurately measure and cut the lumber for the side, front, and back pieces of the second and third bins. Assemble the frames, ensuring they are square and sturdy. Just like the first bin, reinforce the corners with screws or nails for added stability. Install hardware cloth or chicken wire on the sides and bottom for ventilation, securing the edges with a staple gun. Maintaining consistency in construction ensures that all bins have the same level of ventilation and pest control.
Connecting the Bins
If desired, connect the bins to create a single, unified system. This can be done with lumber or metal connectors.
Align the bins side by side and use lumber or metal connectors to join them together. This creates a cohesive unit that is more stable and easier to manage. Make sure the connectors are securely fastened to prevent the bins from shifting. Connecting the bins can also provide a more aesthetically pleasing look to your composting area.
Managing Your Compost
With your three-bin composting system complete, understanding how to manage your compost is crucial for optimal results. Proper management ensures efficient decomposition and nutrient-rich compost.
Adding Materials
Add a mix of “green” (nitrogen-rich) and “brown” (carbon-rich) materials to the first bin.
Green materials include kitchen scraps like fruit and vegetable peels, coffee grounds, and grass clippings. Brown materials consist of dried leaves, shredded paper, cardboard, and wood chips. Aim for a balance of 2 parts brown to 1 part green material to maintain the proper carbon-to-nitrogen ratio. Adding a variety of materials helps create a diverse and nutrient-rich compost.
Turning the Compost
Regularly turn the compost to aerate the pile and promote decomposition.
Use a garden fork or shovel to turn the compost every few days. This introduces oxygen into the pile, which is essential for the microorganisms that break down the organic matter. Turning also helps distribute moisture evenly throughout the compost, preventing dry spots and anaerobic conditions. Regular turning speeds up the composting process and results in a higher quality compost. A well-managed compost pile should have a pleasant earthy smell and no foul odors.
Harvesting the Compost
Once the compost in the third bin is dark, crumbly, and earthy-smelling, it’s ready to use in your garden.
The finished compost should have a rich, dark color and a loose, crumbly texture. It should also have a pleasant earthy scent. Sift the compost to remove any large pieces of undecomposed material. Use the finished compost to enrich your garden soil, amend planting beds, or create nutrient-rich potting mixes. Compost is a valuable soil amendment that improves soil structure, drainage, and fertility, promoting healthy plant growth.
| Key Point | Brief Description |
|---|---|
| 🌱 Benefits | Reduces waste, enriches soil, and improves plant health. |
| 📏 Planning | Choose location and size based on waste and space. |
| 🔨 Construction | Build bins with wood, hardware cloth, and secure connections. |
| 🌿 Management | Balance green/brown materials, turn regularly, and harvest mature compost. |
FAQ
▼
Avoid composting meat, dairy, oily foods, diseased plants, and pet waste, as these can attract pests and create unpleasant odors. These items can also introduce harmful bacteria into the compost.
▼
Turning your compost every 3-7 days is ideal to provide aeration and speed up decomposition. Regular turning helps maintain the right moisture and oxygen levels for efficient composting.
▼
Ready compost is dark, crumbly, and has an earthy smell. There should be no recognizable food scraps or yard waste. It should also be cool to the touch, indicating complete decomposition.
▼
A good size for each bin is 3ft x 3ft x 3ft, but adjust based on your available space and the amount of waste you generate. Ensure bins are accessible for easy turning and management.
▼
Ventilation provides oxygen for the microorganisms that break down organic matter. Good ventilation prevents anaerobic conditions, which can lead to foul odors and slower decomposition rates.
Conclusion
Building and managing a three-bin composting system is a rewarding DIY project that contributes to a sustainable lifestyle and a thriving garden. By following these steps, you can efficiently transform your organic waste into valuable compost, reducing landfill waste and enriching your soil.


