Build a Custom Headboard: Design Ideas & DIY Guide
Building a custom headboard allows you to personalize your bedroom decor and express your unique style, creating a focal point that reflects your personality and enhances your sleeping space.
Creating a bedroom that truly reflects your style involves more than just choosing the right paint color and furniture; it’s about adding personal touches that make the space uniquely yours. One fantastic way to achieve this is to build a custom headboard. Not only does it allow you to tailor the design to your exact preferences, but it also offers a rewarding DIY project that adds character and charm to your bedroom.
Why build a custom headboard?
Building a custom headboard offers numerous benefits that go beyond simply filling a space above your bed. It provides a unique opportunity to infuse your bedroom with your personal style and preferences, turning a functional piece into a statement of your creativity. Let’s explore some of the key reasons why you might consider embarking on this DIY project.
Personalization and style
One of the most compelling reasons to build a custom headboard is the unparalleled opportunity for personalization. Unlike mass-produced headboards that often lack character, a DIY headboard allows you to tailor every aspect of the design to match your existing decor and personal taste. From the shape and size to the materials and finishes, you have complete control over the final product.
Cost-effectiveness
Building a custom headboard can also be a cost-effective alternative to purchasing a new one. High-quality headboards from furniture stores can be quite expensive, especially if you’re looking for unique designs or premium materials. By creating your own headboard, you can save money by sourcing materials yourself and using your DIY skills to bring your vision to life.
Custom size and dimensions
Standard headboard sizes might not always fit your specific needs or the dimensions of your bedroom. Building a custom headboard allows you to create a piece that perfectly fits your bed frame and complements the overall scale of your room. Whether you need a taller headboard for a dramatic effect or a narrower one to accommodate limited space, a custom build ensures a perfect fit.
- Unique design: Stand out from the crowd with a headboard that no one else has.
- Perfect fit: Ensure your headboard complements your bed and room size perfectly.
- Creative outlet: Express your creativity and add a personal touch to your space.
In conclusion, building a custom headboard offers a blend of personalization, cost savings, and creative satisfaction. It’s a chance to create a unique piece that perfectly reflects your style and enhances the overall aesthetic of your bedroom.
Gathering your materials and tools
Before diving into the construction process, it’s essential to gather all the necessary materials and tools. Having everything on hand will not only streamline the building process but also ensure that you achieve the best possible results. Here’s a comprehensive checklist to guide you.
Wood for the frame
The foundation of any headboard is its frame, and the choice of wood is crucial for both structural integrity and aesthetic appeal. Plywood is a popular option due to its affordability and stability. However, if you prefer a more natural look, consider using solid wood like pine, oak, or maple. Ensure the wood is of appropriate thickness to support the design and withstand wear and tear.
Upholstery materials
If you plan to upholster your headboard, you’ll need fabric, batting, and possibly foam. The choice of fabric depends on your personal style and the overall decor of your bedroom. Durable options like linen, cotton, or velvet are popular choices. Batting provides cushioning and softness, while foam adds extra comfort and support. Consider using fire-retardant materials for safety.
Essential tools
Now, let’s talk tools. You’ll need a drill with various bits, a saw (circular saw or hand saw), a staple gun, measuring tape, and a pencil. Clamps are also useful for holding pieces together while the adhesive dries. Personal protective equipment includes safety glasses, gloves, and a dust mask.
- Fabric: Choose durable materials like linen, cotton, or velvet.
- Batting: Provides cushioning and softness for comfort.
- Staple gun: Securely attach fabric to the wooden frame.
Having all your materials and tools ready before you begin will save you time and prevent unnecessary interruptions during the construction process. Take the time to inventory everything and ensure you have all the necessary items before proceeding.
designing your headboard
The initial design phase is crucial, as it sets the stage for the entire project. It’s the time to let your creativity flow and translate your vision into a tangible plan. Let’s explore the key aspects of designing your headboard.
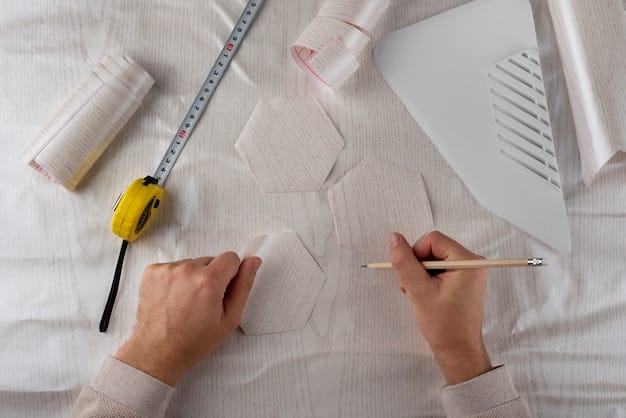
Sketching your ideas
Start by sketching your ideas on paper. Don’t worry about perfection; the goal is to capture the essence of your vision. Experiment with different shapes, sizes, and styles. Consider whether you want a simple, rectangular headboard or something more elaborate with curves or geometric patterns.
Choosing a style
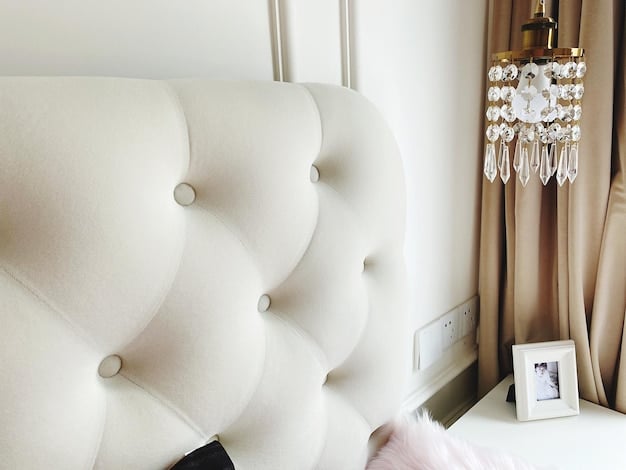
The style of your headboard should complement the overall decor of your bedroom. For a modern aesthetic, consider a sleek, minimalist design with clean lines and neutral colors. If your style is more traditional, you might opt for a tufted headboard with elegant fabric and ornate details. Bohemian styles can incorporate natural materials like wood and rattan, with intricate patterns and textures.
Planning the dimensions
Accurate dimensions are essential for a headboard that fits seamlessly with your bed and room. Measure the width of your bed frame to ensure the headboard is wide enough. Also, consider the height of your mattress and the desired height of the headboard above the mattress. A taller headboard can create a more dramatic effect, while a shorter one offers a more subtle look.
- Minimalist: Clean lines and neutral colors for a modern look.
- Tufted: Elegant fabric and ornate details for a traditional aesthetic.
- Bohemian: Natural materials and intricate patterns for a relaxed vibe.
In summary, the design phase is an opportunity to explore your creativity and translate your vision into a detailed plan. Accurate measurements, a clear understanding of your desired style, and a well-thought-out sketch will ensure that your custom headboard perfectly complements your bedroom.
Step-by-step construction guide
With your design finalized and materials gathered, it’s time to start building your custom headboard. This step-by-step guide will walk you through the construction process, ensuring a smooth and successful project.
Building the frame
Begin by cutting the wood according to your planned dimensions. Assemble the frame using screws or nails, ensuring that all corners are square and secure. Reinforce the joints with wood glue for added stability. If your design includes legs, attach them to the frame at this stage.
Adding upholstery
If you are upholstering your headboard, start by wrapping the frame with batting. Secure the batting with staples, ensuring that it is evenly distributed and wrinkle-free. Next, lay the fabric over the batting and staple it to the back of the frame, pulling it taut as you go. Trim any excess fabric and ensure the staples are hidden for a clean finish.
Finishing touches
Once the construction and upholstery are complete, add any finishing touches to enhance the look of your headboard. This might include adding decorative nailheads, buttons, or trim. Inspect the headboard for any imperfections and make any necessary adjustments to ensure a polished and professional look.
- Secure corners: Use wood glue to reinforce joints for added stability.
- Even distribution: Ensure batting is evenly distributed to avoid wrinkles.
- Hidden staples: Achieve a clean finish by hiding staples.
Following this step-by-step guide will help you construct a sturdy and beautiful custom headboard that perfectly complements your bedroom decor.
Alternative materials and techniques
While wood and upholstery are common choices for headboard construction, there are numerous alternative materials and techniques that can add a unique twist to your DIY project. Let’s explore some creative options to inspire your custom headboard design.
Reclaimed wood
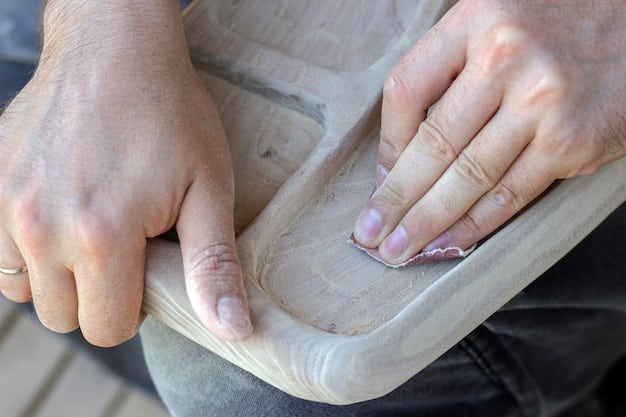
Using reclaimed wood adds a rustic and eco-friendly touch to your headboard. Salvaged wood from old barns, pallets, or furniture can be repurposed to create a one-of-a-kind headboard with plenty of character. Clean and sand the wood thoroughly before assembly to ensure a smooth and safe finish.
Metal accents
Incorporating metal into your headboard design can add an industrial or contemporary flair. Metal accents can be used for the frame, decorative elements, or even as a contrasting material against wood or upholstery. Consider using metal pipes, sheets, or wire mesh to create a unique and eye-catching headboard.
Creative techniques
There are numerous creative techniques you can employ to enhance the look of your headboard. Painting stencils, adding mosaic tiles, or creating a textured surface with paint or plaster can add depth and visual interest. Experiment with different techniques to achieve a look that reflects your personal style.
- Rustic look: Reclaimed wood adds character and eco-friendliness.
- Industrial flair: Metal accents offer a contemporary touch.
- Unique design: Creative techniques add depth and visual interest.
By exploring alternative materials and techniques, you can create a custom headboard that is not only functional but also a true work of art, reflecting your creativity and personal style.
Maintaining your custom headboard
Once your custom headboard is complete, proper maintenance is essential to keep it looking its best for years to come. Regular cleaning and care will not only preserve its appearance but also extend its lifespan. Let’s explore some tips for maintaining your custom headboard.
Regular cleaning
Dust your headboard regularly using a soft cloth or a vacuum cleaner with a brush attachment. For upholstered headboards, spot clean any stains immediately using a mild detergent and water. Avoid using harsh chemicals or abrasive cleaners, as they can damage the fabric or finish.
Preventative measures
To prevent damage to your headboard, avoid placing it in direct sunlight, as this can cause fading over time. Use coasters or mats to protect the surface from scratches or spills. Regularly inspect the headboard for any signs of wear and tear, such as loose staples or damaged fabric, and address them promptly to prevent further damage.
Repairing damage
If your headboard sustains any damage, such as tears in the fabric or scratches on the frame, address it as soon as possible. Minor tears can often be repaired with fabric glue or a needle and thread. Scratches on the frame can be touched up with wood stain or paint. If the damage is extensive, consider consulting a professional furniture repair service.
- Dust regularly: Use a soft cloth to prevent dust buildup.
- Spot clean: Address stains immediately with mild detergent.
- Inspect regularly: Address wear and tear promptly to prevent further damage.
By following these maintenance tips, you can ensure that your custom headboard remains a beautiful and functional focal point in your bedroom for years to come.
| Key Point | Brief Description |
|---|---|
| 🎨 Personalization | Customize the headboard to match your unique style and preferences. |
| 💰 Cost-Effective | Save money by building your own headboard instead of buying a new one. |
| 🔨 DIY Satisfaction | Enjoy the satisfaction of creating a unique piece for your bedroom. |
FAQ
▼
Plywood is affordable and stable, while solid woods like pine, oak, or maple offer a natural look. Choose based on your budget and aesthetic preferences.
▼
Consider durable materials like linen, cotton, or velvet. Select a fabric that complements your bedroom decor and is easy to clean and maintain.
▼
You’ll need a drill, saw, staple gun, measuring tape, and pencil. Clamps are useful for holding pieces together. Safety glasses and gloves are essential for protection.
▼
Dust regularly with a soft cloth. Spot clean stains immediately using mild detergent and water. Avoid harsh chemicals and protect from direct sunlight and scratches.
▼
Yes, reclaimed wood adds a rustic and eco-friendly touch. Clean and sand it thoroughly before assembly to ensure a smooth and safe finish.
Conclusion
Building a custom headboard is a rewarding way to personalize your bedroom and add a unique touch to your decor. By following this guide, you can create a headboard that perfectly reflects your style and enhances your sleeping space. Enjoy the process and the satisfaction of creating something truly your own.


