DIY Deck Repair: Revitalize Your Outdoor Space by Replacing Damaged Boards
DIY deck repair focusing on replacing damaged deck boards is a cost-effective way to restore your outdoor space, enhance its safety, and extend its lifespan with the right tools and techniques.
Is your deck looking worse for wear? Don’t let damaged boards ruin your outdoor enjoyment. Learning DIY deck repair can save you money and let you restore your space yourself, one board at a time.
Assessing Deck Damage: What Needs Replacing?
Before diving into DIY deck repair, a thorough assessment is crucial. Identifying the extent of the damage helps you determine which boards need replacing and what materials to gather.
Carefully examine your deck, looking for these common signs of damage:
Common Signs of Deck Damage
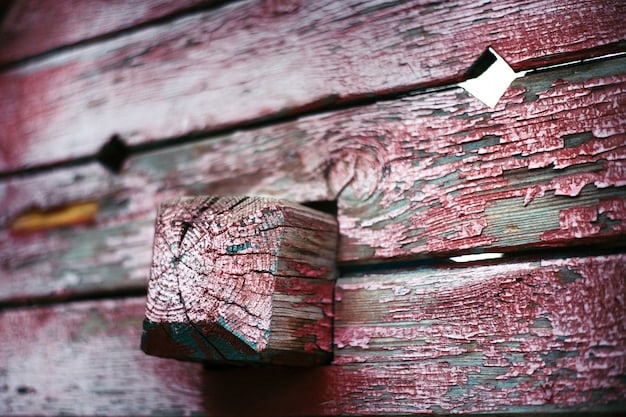
- Rotting Wood: Soft, spongy areas indicate rot, often caused by moisture.
- Cracks and Splintering: Minor cracks might be repairable, but severe splitting warrants replacement.
- Loose or Missing Fasteners: Inspect screws and nails for corrosion or detachment.
- Sagging or Uneven Boards: This could indicate structural issues beyond surface damage.
By identifying these issues early, you can prevent further damage and ensure the safety of your deck. Remember to document the number and size of damaged boards to streamline your repair process.
Gathering Your Tools and Materials for Deck Repair
Proper preparation is key to any successful DIY deck repair job. That starts with gathering the necessary tools and materials. This will not only make the repair process smoother but also ensure a professional-looking result.
Here’s a comprehensive list to get you started:
- Replacement Deck Boards: Choose boards that match the existing wood type and dimensions for a seamless look.
- Safety Glasses and Gloves: Protect yourself from splinters and debris.
- Drill and Driver Bits: Essential for removing old screws and installing new ones.
- Crowbar or Pry Bar: Used to carefully lift and remove damaged boards.
- Circular Saw or Hand Saw: For cutting replacement boards to the correct length.
- Measuring Tape and Pencil: For accurate measurements and markings.
- Wood Screws or Deck Screws: Ensure they are exterior-grade and compatible with your wood.
- Wood Preservative or Sealant: To protect the new boards from future damage.
Having all your tools and materials within easy reach will save you time and frustration. Depending on the extent of the damage, you might also consider renting specialized tools like a power planer for smoothing surfaces or a deck screw removal tool.
Removing Damaged Deck Boards Safely and Efficiently
Now that you’ve assessed the damage and gathered your tools, it’s time to remove the old, damaged deck boards. This step requires patience and care to avoid damaging the surrounding structure.
Follow these steps for safe and efficient removal:
Steps for Removing Damaged Deck Boards
- Prepare the Area: Clear any furniture or obstacles from the immediate work area.
- Loosen Fasteners: Use a drill or screwdriver to remove any visible screws or nails. If the fasteners are stripped or rusted, use a screw extractor or penetrating oil.
- Pry Up the Board: Insert a crowbar or pry bar between the damaged board and the deck joists. Apply gentle, even pressure to lift the board. Be careful not to damage the joists.
- Remove Stubborn Fasteners: If the board is still attached, look for hidden fasteners and remove them. You might need to use a reciprocating saw to cut through stubborn nails or screws.
- Dispose of the Old Board: Properly dispose of the damaged board according to local regulations.
When removing boards near the edge of the deck, pay close attention to the adjacent boards to avoid splintering or cracking. Taking your time and using the right tools will ensure a clean and damage-free removal.
Cutting and Fitting Replacement Deck Boards
With the damaged boards removed, you can now install the new replacement boards. This step requires precision to ensure a snug and seamless fit. Accurate measurements and careful cutting are essential for a professional-looking DIY deck repair.
Here’s how to cut and fit your replacement boards:
Steps for Cutting and Fitting Deck Boards
- Measure the Gap: Use a measuring tape to accurately measure the space where the old board was removed. Measure at multiple points to account for any variations.
- Cut the Board to Size: Transfer the measurements to the replacement board and use a circular saw or hand saw to cut it to the correct length. Cut slightly longer than needed, then trim for a perfect fit.
- Test the Fit: Place the board in the gap to check the fit. It should fit snugly without being too tight or too loose.
- Trim as Needed: If the board is too long, trim it down using the saw. If it’s too short, you’ll need to start with a new board.
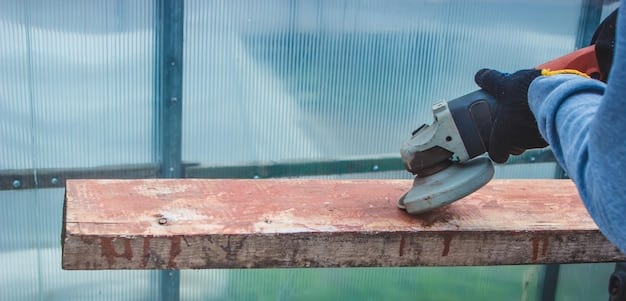
- Sand Rough Edges: Use sandpaper to smooth any rough edges or splinters. This will improve the appearance and prevent injuries.
Before attaching the new board, consider applying a wood preservative or sealant to the cut ends to protect them from moisture and rot. A little extra care at this stage can significantly extend the life of your repaired deck.
Securing the New Deck Boards: Screws and Spacing
Once you’ve cut and fitted the replacement boards, the next step is to securely attach them to the deck joists. Proper fastening is crucial to ensure the stability and longevity of your DIY deck repair.
Here’s how to secure the new boards:
Methods for Securing Deck Boards
- Pre-Drill Pilot Holes: To prevent splitting, pre-drill pilot holes through the deck board and into the joists.
- Use Deck Screws: Choose exterior-grade deck screws that are long enough to penetrate the joists securely.
- Maintain Proper Spacing: Use spacers to maintain consistent gaps between the boards. This allows for expansion and contraction due to weather changes.
- Conceal Screw Heads: Countersink the screws slightly below the surface of the board for a clean, professional look.
When fastening the boards, avoid over-tightening the screws, which can strip the threads and weaken the connection. A snug, secure fit is all you need. Consider using a screw gun with adjustable torque to prevent over-tightening.
Finishing Touches: Staining and Sealing for Protection
With the new boards now securely in place, you’re nearly finished with your DIY deck repair project. The final step is to protect your work and provide a finished, polished appearance.
This involves staining or sealing the new boards to match the existing deck. Here’s what you need to know:
How to Apply Stain and Seal
- Clean the Deck: Before applying any finish, clean the entire deck thoroughly to remove dirt, debris, and mildew.
- Choose the Right Finish: Select a stain or sealant that is compatible with the existing wood and finish. Consider the level of protection and the desired color.
- Apply Evenly: Use a brush, roller, or sprayer to apply the finish evenly across the new boards. Follow the manufacturer’s instructions for application and drying times.
- Allow to Dry Completely: Let the finish dry completely before replacing furniture or walking on the deck.
Regular maintenance, including cleaning and re-sealing every one to two years, will help keep your deck in top condition and prevent future damage. Taking these extra steps ensures that you’ll have years of outdoor enjoyment.
| Key Point | Brief Description |
|---|---|
| 🛠️ Assessing Damage | Identify rot, cracks, and loose fasteners to determine repair needs. |
| 🧰 Gathering Tools | Collect replacement boards, safety gear, saws, drills, and appropriate screws. |
| 🔨 Removing Boards | Carefully pry up and remove old, damaged boards without harming the joists. |
| 🛡️ Protecting Finish | Apply stain or sealant to protect repaired areas and enhance deck’s appearance. |
Frequently Asked Questions
▼
If the board has extensive rot, deep cracks, or significant structural damage, it’s generally better to replace it. Minor surface issues might be repairable.
▼
Use the same type of wood as your existing deck for a consistent look and durability. Common choices include treated pine, cedar, and redwood. Composite decking is also a low-maintenance option.
▼
Regular cleaning, sealing, and maintenance are key. Keep the deck free from debris, repair any minor damage promptly, and ensure good ventilation to prevent moisture buildup.
▼
Yes, DIY deck repair is manageable for beginners. Start with small repairs, follow safety precautions, and don’t hesitate to seek advice from professionals if needed.
▼
Generally, you should stain or seal your deck every one to two years, but this depends on factors like weather exposure and the type of finish used. Inspect the deck regularly and reapply when the finish starts to wear off.
Conclusion
By following these steps, you can successfully tackle DIY deck repair, saving money and enhancing your outdoor living space. Remember to prioritize safety, use the right tools, and maintain your deck regularly to enjoy it for years to come.

")


