DIY Home Bar: Convert Your Living Room Corner into a Stylish Bar
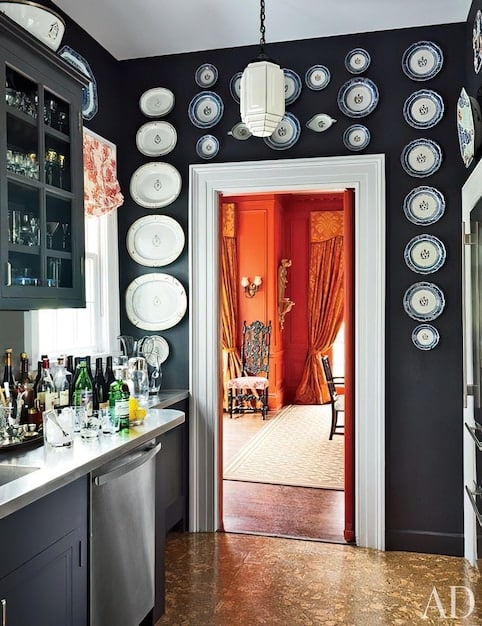
Transforming a corner of your living room into a stylish DIY home bar is a creative and cost-effective way to elevate your entertainment space, providing a dedicated area for mixing drinks and socializing with friends and family.
Ready to elevate your home entertainment game? Creating a **DIY home bar: convert a corner of your living room into a stylish home bar** project is more accessible than you might think. With a bit of planning and some elbow grease, you can transform an unused corner into the ultimate hangout spot.
Planning Your DIY Home Bar
Before diving into the project, careful planning is crucial. Consider your available space, budget, and desired aesthetic. A well-thought-out plan will save you time and money in the long run and ensure your **DIY home bar** perfectly fits your needs and style.
Assess Your Space
Start by measuring the corner where you envision your bar. Note the dimensions, including height, width, and depth. Consider any architectural features, such as windows, outlets, or heating vents, that may impact your design.
Determine Your Budget
Set a realistic budget for your project. Factor in the cost of materials, tools, and any professional help you may need. Research prices for various options to stay within your budget.
Choose a Style
Decide on a style that complements your existing decor. Whether you prefer a modern, rustic, or classic look, choose materials and finishes that reflect your taste. Consider the overall ambiance you want to create.
With these preliminary steps in place, you’re ready to start defining the layout of your bar. Let’s continue with some elements that you should consider:
- Bar Cart: Can be used as stand-alone piece or as part of a bigger bar setup
- Shelving Units: Either free-standing or wall-mounted, for displaying bottles and glasses.
- Countertop: The main surface for preparing drinks.
- Seating: Bar stools or chairs to accommodate guests.
By carefully considering these elements and planning accordingly, you lay the groundwork for a successful and stylish DIY home bar project.
Selecting the Right Materials for Your Bar
Choosing the right materials is essential for both the aesthetics and durability of your **DIY home bar**. Consider factors like cost, ease of use, and the overall style you want to achieve. Opting for high-quality materials will pay off in the long run, ensuring your bar looks great and lasts for years to come.
Wood vs. Metal
Wood offers a warm, classic look and is relatively easy to work with. Metal, on the other hand, provides a modern, industrial vibe and is known for its durability. Decide which material best suits your style and consider combining both for a unique look.
Countertop Options
The countertop is a focal point of your bar, so choose wisely. Popular options include solid wood, butcher block, granite, or epoxy resin. Each offers a different aesthetic and level of durability.
Finishes and Hardware
Pay attention to the finishes and hardware you select. Choose paints, stains, and sealants that are appropriate for your chosen materials. Opt for stylish and functional hardware, such as knobs, pulls, and hinges, to complete the look.
When selecting materials, remember to consider how they interact in the space.
- Wood Type: Pine is affordable and easy to work with, while oak and maple offer greater durability and a richer look.
- Metal Finish: Stainless steel is sleek and easy to clean, while brass and copper add a touch of elegance.
- Countertop Sealer: Protect your countertop from spills and stains with a high-quality sealer.
Choosing materials that are not only visually appealing but also functional and durable will ensure satisfaction with your DIY space. You’ll be able to enjoy it for years to come.
Essential Tools and Equipment
Having the right tools and equipment will make your **DIY home bar** project much easier and more enjoyable. While some tools are essential for construction, others are necessary for mixing and serving drinks. Invest in quality tools that will last and make your bartending experience seamless.
Construction Tools
For building the bar itself, you’ll need basic tools like a saw, drill, screwdriver, measuring tape, level, and sandpaper. Depending on your design, you may also need a jigsaw or router for more intricate cuts.
Bartending Essentials
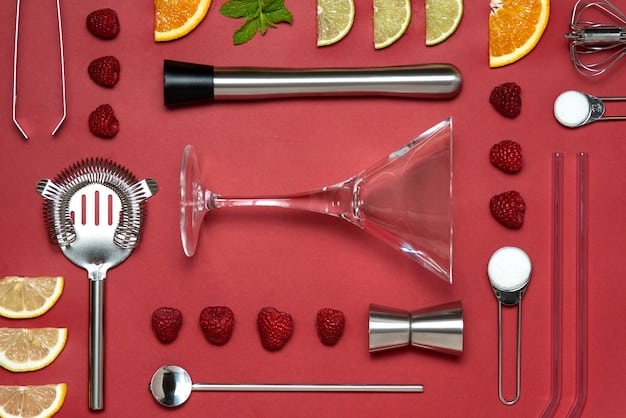
Equip your bar with essential bartending tools, such as a cocktail shaker, jigger, muddler, strainer, bar spoon, and bottle opener. These tools will help you mix drinks like a pro.
Glassware and Accessories
Stock your bar with a variety of glassware, including highball glasses, rocks glasses, martini glasses, and wine glasses. Add accessories like ice buckets, coasters, and napkins to complete the setup.
Let’s check some items you need to build your bar:
- Safety Gear: Wear safety glasses and gloves when working with power tools.
- Clamps: Use clamps to hold pieces together while gluing or screwing.
- Level: Ensure your bar is level for a professional look and stable surface.
With the right tools and equipment, crafting your DIY home bar and mixing your favorite drinks will become a breeze.
Building Your Bar: Step-by-Step Guide
Now that you’ve gathered your materials and tools, it’s time to start building your **DIY home bar**. Follow these step-by-step instructions to create a functional and stylish space in your living room corner. Remember to take your time and double-check measurements to ensure a perfect fit.
Constructing the Frame
Start by building the frame of your bar using wood or metal. Cut the pieces according to your measurements and assemble them using screws or nails. Ensure the frame is sturdy and level.
Adding Shelves and Storage
Install shelves and storage compartments within the bar frame. Use adjustable shelves to accommodate different bottle sizes and glassware. Consider adding drawers or cabinets for storing smaller items.
Installing the Countertop
Attach the countertop to the bar frame using screws or adhesive. Ensure the countertop is securely fastened and level. Consider adding a backsplash to protect the wall from spills.
During this stage, consider the following aspects:
- Wood Glue: Use wood glue in addition to screws for a stronger and more durable frame.
- Pilot Holes: Drill pilot holes before driving screws to prevent splitting the wood.
- Sealing: Seal any exposed wood to protect it from moisture and spills.
Adding the countertop will be a crucial step to the process. You’ll start seeing the shape of your new home bar!
Decorating and Accessorizing Your Home Bar
Once the construction is complete, it’s time to decorate and accessorize your **DIY home bar**. This is where you can truly personalize your space and create a welcoming atmosphere. Choose decor items that reflect your style and enhance the overall ambiance.
Lighting
Install lighting to brighten up your bar area. Options include LED strip lights, pendant lights, or recessed lighting. Consider adding a dimmer switch for adjustable ambiance.
Signage and Art
Add signage or artwork to personalize your bar. Choose vintage signs, custom artwork, or framed prints that reflect your taste. Consider adding a chalkboard for displaying drink specials.
Personal Touches
Incorporate personal touches to make your bar unique. Display collectibles, souvenirs, or family photos. Add plants or flowers to bring life to the space.
Consider the following recommendations:
- Mirrors: Add a mirror behind the bar to create the illusion of more space and reflect light.
- Bar Mats: Use bar mats to protect your countertop from spills and add a professional touch.
- Coasters: Provide coasters for guests to protect your furniture from water rings.
By adding the finishing touches, you can transform your DIY project into a space you’ll enjoy for a long time.
Stocking your Home Bar: The Essentials
No **DIY home bar** is complete without a well-stocked selection of spirits, mixers, and garnishes. Curate a collection that caters to your taste and the preferences of your guests. Having the essentials on hand will allow you to mix a variety of cocktails and keep the drinks flowing.
Essential Spirits
Start with the basics, such as gin, vodka, rum, tequila, and whiskey. Choose a range of styles and price points to accommodate different tastes.
Mixers and Ingredients
Stock up on essential mixers like club soda, tonic water, ginger ale, and cola. Keep simple syrup, bitters, and lime juice on hand for cocktail making.
Garnishes and Extras
Provide a variety of garnishes, such as lemons, limes, oranges, olives, and cherries. Store them in airtight containers to keep them fresh.
- Ice: Invest in a good ice maker or keep plenty of ice on hand.
- Bitters: Experiment with different types of bitters to add complexity to your cocktails.
- Liqueurs: Add liqueurs like triple sec, amaretto, and coffee liqueur to expand your cocktail repertoire.
With a well-stocked bar, you’ll be equipped to handle any drink request that comes your way.
| Key Point | Brief Description |
|---|---|
| 💡 Planning Ahead | Assessing space, budget, and style preferences are critical steps. |
| 🔨 Material Selection | Wood or metal, solid woods, and quality finishes make a difference. |
| 🍹 Essential Stock | Key spirits, mixers, and garnishes complete the bar. |
| ✨ Decor & Style | Signage, lighting and personal touches help personalize the space. |
FAQ
▼
The best location is typically an unused corner, providing ample space without disrupting foot traffic. Ensure it’s near an electrical outlet for lighting and appliances.
▼
Durable wood like oak or maple is ideal for the frame and shelves, paired with a sturdy countertop material like butcher block or granite. Metal accents can add a modern touch.
▼
A saw, drill, screwdriver, measuring tape, and level are essential for construction. For bartending, a cocktail shaker, jigger, muddler, and strainer are must-haves.
▼
Use thrift store finds, DIY artwork, and strategically placed lighting to create a stylish atmosphere without breaking the bank. Plants and personal collectibles also add character.
▼
Start with gin, vodka, rum, tequila, and whiskey to cover a wide range of cocktails. Add essential mixers like tonic water, soda, and bitters for versatility.
Conclusion
Creating a **DIY home bar** in your living room is a rewarding project that can transform your entertainment space. With careful planning, the right materials, and a touch of creativity, you can build a stylish and functional bar that reflects your personal style. So, grab your tools, gather your materials, and get ready to turn that unused corner into your favorite hangout spot.
