DIY Home Theater: Convert Your Recliners into Custom Seats
Transform your living room into the ultimate home theater by converting your existing recliners into custom home theater seating, enhancing comfort and style for an immersive cinematic experience.
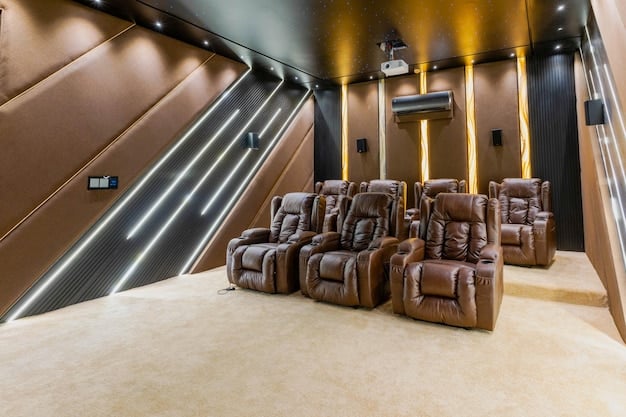
Transforming your living room into a cinematic haven doesn’t always require a complete overhaul. With a bit of DIY ingenuity, you can convert your existing recliners into comfortable, custom DIY home theater seating: convert recliners into custom home theater seats, bringing the magic of the movies right into your home.
Finding the Perfect Recliner for Your Home Theater
Selecting the right recliners is the first step in creating your DIY home theater haven. Consider comfort, size, and style to ensure your selections fit both your body and your aesthetic preferences.
The foundation of any great home theater is comfortable seating. Before you dive into the DIY aspects, it’s crucial to select recliners that are well-suited for conversion. Here’s what to look for:
Comfort is Key
Naturally, the most important aspect is comfort. After all, what’s the point of a home theater if you can’t relax and enjoy the show? Look for recliners with ample padding, lumbar support, and smooth reclining mechanisms. Leather or high-quality fabric options can add to the overall comfort and luxury.
Size Matters
Consider the size of your room and the number of seats you want to include. Measure your space carefully to ensure that the recliners will fit comfortably without overcrowding the area. Also, think about the size of each individual recliner – you’ll want to ensure there’s enough space for people to move around and recline fully.
Style and Aesthetics
The style of your recliners should complement the overall aesthetics of your home theater. Whether you prefer a modern, minimalist design or a more classic, traditional look, choose recliners that match your personal taste. Consider color, material, and design details to create a cohesive and inviting atmosphere.
- Assess your space: Measure available space for seating.
- Prioritize comfort: Look for adequate padding and support.
- Match your style: Choose recliners that complement your interior decor.
Ultimately, the right recliner will provide a comfortable and stylish seating option that enhances your home theater experience.
Essential Tools and Materials for Customization
Once you’ve chosen your recliners, gather the tools and materials necessary for the conversion process. This may include items like power drills, saws, upholstery materials, and custom accessories.
Transforming your recliners into custom home theater seating requires careful planning and the right tools. Here’s a list of essentials to get you started:
Tools of the Trade
Having the right tools will make the conversion process smoother and more efficient. Here are some must-have tools:
- Power Drill: For installing cup holders, bass shakers, and other accessories.
- Saws (Circular Saw or Jigsaw): For cutting wood to create custom additions.
- Measuring Tape: Ensuring precise measurements for all modifications.
- Staple Gun: Securely attaching fabric or upholstery materials.
- Screwdrivers: Both Phillips and flat-head, for various screws and fasteners.
Materials and Accessories
Selecting the right materials and accessories can significantly enhance the functionality and aesthetics of your home theater seating. Consider the following:
- Cup Holders: Essential for keeping drinks within easy reach. Look for durable, easy-to-clean options.
- Bass Shakers: These devices attach to the recliner and vibrate with the low frequencies of your audio, adding a tactile dimension to your viewing experience.
- Upholstery Materials: If you plan to reupholster or add custom padding, select high-quality fabric or leather that matches your theater’s decor.
- Wiring and Cables: For connecting bass shakers, USB charging ports, or other electronic accessories.

By gathering these essential tools and materials, you’ll be well-prepared to customize your recliners into the ultimate home theater seating experience. Remember to prioritize safety and take your time to ensure each modification is done correctly.
Adding Custom Cup Holders and Accessories
One of the most practical additions to any home theater seating is cup holders. Installing cup holders into your recliners not only adds convenience but also helps prevent spills and keeps your viewing area tidy.
Adding custom cup holders and accessories can significantly enhance the functionality and comfort of your DIY home theater seating. Here’s how:
Selecting the Right Cup Holders
When choosing cup holders, consider both functionality and aesthetics. Stainless steel or plastic options are durable and easy to clean. Look for designs that fit snugly into your recliner’s armrests and can accommodate various cup sizes.
Installation Tips
- Measure and Mark: Use a measuring tape and marker to accurately determine the placement of the cup holders on the armrests.
- Drill with Precision: Use a hole saw attachment with your power drill to create the necessary opening. Start with a pilot hole and gradually increase the size to avoid damaging the armrest.
- Secure the Cup Holder: Depending on the design, you may need to use screws or adhesive to securely attach the cup holder. Ensure it is firmly in place to prevent spills.
Additional Accessories
- USB Charging Ports: Install USB charging ports to keep your devices powered up during long movie sessions.
- LED Lighting: Adding LED strip lights underneath the recliners can create a unique and immersive ambiance.
By incorporating custom cup holders and other accessories, you can transform your recliners into a truly personalized and functional home theater seating experience. Take the time to plan each addition carefully, ensuring it complements your overall design and provides maximum comfort and convenience.
Integrating Bass Shakers for Immersive Sound
Take your home theater experience to the next level by integrating bass shakers into your recliners. These devices vibrate in sync with the low frequencies of your sound system, adding a tactile dimension to your viewing pleasure.
Integrating bass shakers into your recliners can elevate your home theater experience by adding a tactile dimension to the sound. Here’s how to make it happen:
Understanding Bass Shakers
Bass shakers, also known as tactile transducers, are devices that convert low-frequency audio signals into vibrations. When attached to your recliner, they allow you to feel the rumble of explosions, the deep notes of music, and other low-end sounds, creating a more immersive and engaging viewing experience.
Selecting the Right Bass Shakers
When choosing bass shakers, consider their power rating, frequency response, and mounting options. Higher power ratings generally provide stronger vibrations, while a broad frequency response ensures that you’ll feel a wide range of low-end frequencies. Also, make sure the bass shakers are compatible with your recliner’s frame and can be easily mounted.
Installation Steps
- Mounting: Attach the bass shakers to the underside of your recliner, typically to the frame or seat base. Use screws or adhesive to securely fasten them in place.
- Wiring: Connect the bass shakers to your home theater receiver or amplifier using speaker wire. You may need a separate amplifier specifically for the bass shakers to provide sufficient power.

By integrating bass shakers into your DIY home theater seating, you’ll add a whole new level of realism and immersion to your movie-watching experience. The tactile feedback will sync with the audio, making you feel like you’re part of the action.
Upholstering and Adding Custom Padding
For a truly personalized touch, consider reupholstering your recliners with new fabric or leather. Adding custom padding can also enhance comfort and support, ensuring that your home theater seating is perfect for hours of viewing enjoyment.
Upholstering and adding custom padding can transform your recliners into luxurious home theater seating that perfectly matches your style and comfort preferences. Here’s how to achieve a professional-looking result:
Choosing Upholstery Materials
Select high-quality fabric or leather that is durable, comfortable, and visually appealing. Consider the color, texture, and pattern to ensure it complements your home theater’s decor. Leather provides a classic and luxurious feel, while fabric options offer a wider range of colors and patterns.
Adding Custom Padding
Enhance the comfort of your recliners by adding custom padding to the seat, backrest, and armrests. Use high-density foam or batting to provide extra cushioning and support. Consider the thickness and density of the padding to achieve the desired level of comfort.
Upholstering Techniques
- Remove Existing Fabric: Carefully remove the existing fabric from the recliner, taking note of how it is attached and secured. Use a staple remover or pliers to remove any staples or tacks.
- Cutting the New Fabric: Use the old fabric as a template to cut the new fabric to the correct size and shape. Add extra allowance for seams and hemming.
- Attaching the Fabric: Use a staple gun to securely attach the new fabric to the recliner frame, starting from the center and working your way outwards. Pull the fabric taut and smooth out any wrinkles or creases.
Optimizing Placement for the Best Viewing Experience
The final step in creating your DIY home theater is to optimize the placement of your recliners. Consider factors like screen size, viewing distance, and acoustics to ensure that you have the best possible viewing experience.
Optimizing the placement of your recliners is essential to creating the best possible viewing experience in your home theater. Here’s what to consider:
Screen Size and Viewing Distance
The size of your screen and the distance from your seating area are critical factors in determining the optimal placement of your recliners. As a general rule, the viewing distance should be about 1.5 to 2.5 times the diagonal screen size. This ensures that the image fills your field of view without causing eye strain.
Acoustics and Sound Quality
Consider the acoustics of your room when positioning your recliners. Avoid placing them directly against walls or in corners, as this can cause sound reflections and distort the audio quality. Experiment with different seating arrangements to find the sweet spot where the sound is balanced and clear.
Creating a Focal Point
- Center Alignment: Position the main viewing seat directly in front of the center of the screen. This ensures that the viewer has a direct line of sight and the best possible image clarity.
- Minimize Obstructions: Avoid placing any objects that might obstruct the view, such as lamps, plants, or furniture. Keep the space between the screen and the seating area clear.
By carefully considering these factors, you can create a home theater that delivers an immersive and enjoyable viewing experience for you and your guests.
| Key Point | Brief Description |
|---|---|
| 💺 Recliner Selection | Choose comfortable, appropriately sized recliners that match your home theater’s style. |
| 🛠️ Essential Tools | Gather tools like power drills, saws, staple guns, and measuring tapes for efficient customization. |
| 🥤 Cup Holder Installation | Add cup holders for convenience and to prevent spills, enhancing the viewing experience. |
| 🔊 Bass Shaker Integration | Incorporate bass shakers for tactile feedback, making your home theater more immersive. |
Frequently Asked Questions
▼
Look for recliners with high backs, good lumbar support, and reclining mechanisms that allow for full extension. Leather or quality fabric options enhance comfort and aesthetics.
▼
Measure the diameter of your most frequently used cup, add a bit of clearance, and mark the center point on the armrest. Use a hole saw of appropriate size for drilling.
▼
The installation process depends on the model, but generally involves mounting the shaker to the recliner frame and wiring it to an amplifier. Follow the manufacturer’s instructions closely.
▼
Yes, you can install USB charging ports by drilling suitable holes in the armrests and running power from a nearby outlet or a power strip under the seats.
▼
Proper recliner placement is crucial for sound quality. Avoid placing seats directly against walls. Experiment to find the “sweet spot” where the audio is balanced and clear.
Conclusion
By following these tips, you can transform your existing recliners into custom DIY home theater seating: convert recliners into custom home theater seats, enhancing your viewing experience and adding a personalized touch to your home.


