Upgrade Your Grill: Convert to a Smoker for Under $50
Transform your standard grill into a capable smoker with a few inexpensive parts and some simple modifications, enhancing your barbecue experience without breaking the bank.
Ready to take your grilling game to the next level? You can upgrade your grill: convert a standard grill to a smoker with $50 in parts, turning it into a versatile outdoor cooker that delivers delicious, smoky flavors.
Why Convert Your Grill to a Smoker?
Converting your grill into a smoker opens up a whole new world of culinary possibilities. Smoking allows you to cook low and slow, infusing meats with rich, smoky flavors that are hard to achieve with direct grilling. This method is perfect for ribs, brisket, pork shoulder, and even chicken or fish.
Beyond expanding your recipe repertoire, converting your grill is also a cost-effective way to enjoy smoked foods. High-end smokers can be quite expensive, but with a few simple modifications, you can achieve similar results with the grill you already own. This DIY project is not only budget-friendly but also a rewarding experience that allows you to customize your setup to your specific needs.
The Benefits of Smoking
Smoking offers several advantages over traditional grilling:
- Enhanced Flavor: The slow cooking process and smoke infusion create a depth of flavor that grilling alone can’t match.
- Tender Results: Low and slow cooking breaks down tough connective tissues, resulting in incredibly tender and juicy meats.
- Versatility: You can smoke a wide variety of foods, from meats and cheeses to vegetables and even nuts.
Is Your Grill a Good Candidate?
Not all grills are equally suited for conversion. Charcoal grills are generally easier to convert than gas grills, as they naturally provide a smoky environment. However, with a few extra steps, even a gas grill can be transformed into a decent smoker. Consider the following factors when deciding if your grill is a good candidate:
- Size: A larger grill will provide more space for indirect cooking, which is essential for smoking.
- Lid: A tight-fitting lid is crucial for maintaining a consistent temperature and trapping smoke.
- Airflow Control: The ability to control airflow is important for regulating the temperature and smoke density.
In conclusion, converting your grill to a smoker is a great way to expand your cooking skills, create delicious food, and save money. By considering the benefits of smoking and the suitability of your grill, you can embark on a rewarding DIY project that will elevate your backyard barbecue experience.
Essential Parts for Your Smoker Conversion
To successfully convert your grill into a smoker, you’ll need a few essential parts. These items are readily available at most hardware stores and online retailers, and the total cost should stay well under $50.
Having the right tools and supplies will make the conversion process smoother and ensure better results. From accurate thermometers to durable water pans, each component plays a crucial role in creating a stable smoking environment and achieving the desired flavor profile.
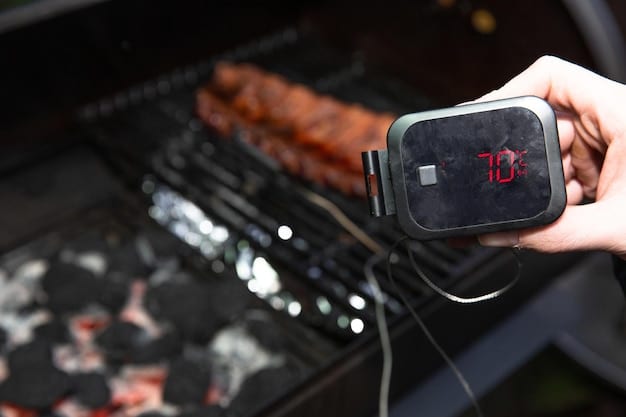
Thermometer
A reliable thermometer is crucial for monitoring the internal temperature of your grill and the food you’re smoking. Look for a dual-probe thermometer that allows you to track both simultaneously.
Water Pan
A water pan helps maintain a consistent temperature and adds moisture to the cooking environment, preventing the meat from drying out. A disposable aluminum pan works well, or you can use a cast-iron skillet.
Wood Chips or Chunks
The type of wood you use will significantly impact the flavor of your smoked food. Experiment with different varieties, such as hickory, mesquite, apple, or cherry.
- Hickory: Offers a strong, smoky flavor that pairs well with beef and pork.
- Mesquite: Provides a bold, earthy flavor that is ideal for grilling and smoking.
- Apple: Imparts a sweet, fruity flavor that complements poultry and fish.
Optional but Helpful
While not strictly necessary, these items can make the conversion process easier and improve your results:
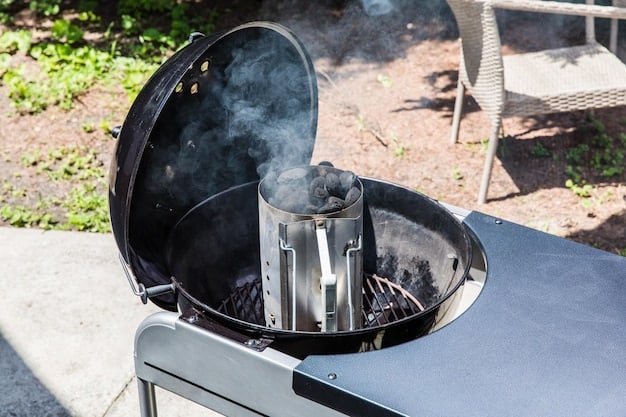
- Chimney Starter: For quickly and evenly lighting charcoal.
- Grill Grates: An extra set for more even cooking.
- Tongs: A long set of tongs to handle hot items carefully.
In conclusion, gathering the essential parts for your smoker conversion is a straightforward process that won’t break the bank. By investing in a reliable thermometer, a suitable water pan, and your preferred wood chips, you’ll be well-equipped to transform your grill into a capable smoker and start enjoying delicious, homemade smoked foods.
Modifying Your Grill for Smoking
Once you’ve gathered the necessary parts, it’s time to modify your grill for smoking. These modifications are relatively simple and can be completed in a few hours with basic tools.
Proper modification is key to creating an effective smoking environment. By focusing on airflow, heat distribution, and smoke containment, you can optimize your grill’s performance and achieve consistent results.
Setting Up the Cooking Zone
Create a two-zone cooking area by placing charcoal on one side of the grill. This allows you to cook food indirectly, away from the direct heat source.
Adding the Water Pan
Place the water pan on the same side as the charcoal, but slightly away from the heat. This will help maintain a consistent temperature and add moisture to the cooking environment.
Controlling Airflow
Adjust the grill’s vents to control airflow. Opening the vents will increase the temperature, while closing them will lower it. Experiment to find the right balance for your desired smoking temperature.
Consider these points for better airflow control:
- Ensure the intake vents are clear of debris.
- Monitor wind effect on heat circulation during grilling.
- Use a digital thermometer to achieve desired temperature levels.
Maintaining Temperature
Maintaining a consistent temperature is crucial for successful smoking. Use the thermometer to monitor the temperature and adjust the vents as needed.
- When the temperature drops, add more charcoal.
- If the temperature rises too high, close the vents slightly.
- Adjust accordingly to achieve desired levels.
In summary, modifying your grill for smoking involves creating a two-zone cooking area, adding a water pan, and controlling airflow to maintain a consistent temperature. These simple steps will transform your grill into a capable smoker, allowing you to enjoy delicious, homemade smoked foods.
Smoking Techniques and Tips
With your grill converted to a smoker, mastering a few key techniques will ensure consistently delicious results. Understanding heat control, smoke management, and proper food preparation are essential for successful smoking.
These techniques will help you to prepare, cook, and enjoy smoked meat:
Choosing the Right Wood
The type of wood you use has a significant impact on the flavor of your smoked food. Experiment with different varieties to find your favorites.
- Hickory: Strong and smoky, ideal for beef and pork.
- Mesquite: Bold and earthy, great for grilling and smoking.
- Apple: Sweet and fruity, complements poultry and fish.
- Cherry: Mild and sweet, enhances the flavor of pork and poultry.
Maintaining Smoke
Add wood chips or chunks to the charcoal regularly to maintain a consistent smoke level. Soak wood chips in water for about 30 minutes to prevent them from burning too quickly.
Controlling Temperature
Maintain a consistent temperature throughout the smoking process. The ideal temperature for smoking is typically between 225°F and 275°F.
Monitoring Food Temperature
Use a meat thermometer to monitor the internal temperature of your food. This is the most accurate way to determine when it’s done.
Ensure proper cooking by:
- Checking internal temperatures to ensure best quality
- Controlling air flow and keeping a close watch
- Letting the meat rest to keep it flavorful and succulent.
Resting the Meat
Once the meat is cooked, tent it with foil and let it rest for at least 30 minutes before slicing. This allows the juices to redistribute, resulting in a more tender and flavorful product.
In conclusion, mastering smoking techniques involves choosing the right wood, maintaining smoke and temperature levels, monitoring food temperature, and resting the meat properly. By following these tips, you’ll be well on your way to creating delicious, homemade smoked foods that rival those from professional smokers.
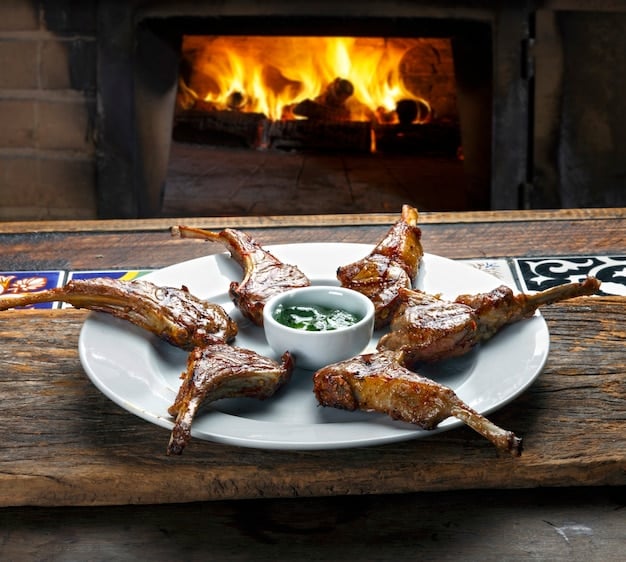
Recipes to Try on Your DIY Smoker
Now that your grill is converted into a smoker, it’s time to explore the world of smoked cuisine. From classic barbecue ribs to flavorful smoked salmon, the possibilities are endless. Here are a few recipes to get you started.
These tried and tested recipes will show you how versatile your new grill-smoker is:
Smoked Ribs
A classic barbecue staple, smoked ribs are incredibly tender and flavorful. Use a dry rub of your favorite spices, and smoke for 6-8 hours at 225°F.
Pulled Pork
Another barbecue favorite, pulled pork is perfect for sandwiches, sliders, or tacos. Smoke a pork shoulder for 8-10 hours at 250°F.
Smoked Salmon
For a lighter option, try smoking salmon. Brine the salmon for a few hours, then smoke for 3-4 hours at 180°F.
Smoked Chicken
Smoking chicken is a flavorful and easy way to prepare poultry. Brine the chicken for a few hours, then smoke for 3-4 hours at 250°F.
- Maintain a stable heat for consistent cooking.
- Try applying a BBQ sauce during the last hour of smoking.
- Ensure proper brining procedure to enhance flavor.
Smoked Vegetables
Don’t forget about vegetables! Smoking vegetables adds a unique depth of flavor to your favorite side dishes. Try smoking corn on the cob, bell peppers, or zucchini.
- Toss vegetables with oil, seasoning, and herbs.
- Keep temperatures low for more even cooking.
- Remember to check them frequently.
In summary, your DIY smoker opens up a world of culinary possibilities. By trying these recipes, you’ll discover the diverse flavors and textures that can be achieved through smoking. Whether you’re creating classic barbecue dishes or experimenting with new recipes, your converted grill will become a valuable tool in your outdoor cooking arsenal.
Maintaining and Cleaning Your Smoker
Proper maintenance and cleaning are essential for keeping your converted grill in top condition and ensuring optimal performance. Regular cleaning prevents the buildup of grease and grime, which can affect the flavor of your food and potentially create a fire hazard.
To ensure that your new grill stays in great shape for a long time, follow these procedures.
Cleaning the Grates
After each use, clean the grates with a wire brush to remove any food residue. For stubborn buildup, soak the grates in warm, soapy water before scrubbing.
Emptying the Ash Catcher
If you’re using a charcoal grill, empty the ash catcher regularly to prevent ash buildup. This will improve airflow and prevent flare-ups.
Cleaning the Water Pan
Clean the water pan after each use to remove any grease or food particles. A disposable aluminum pan can be discarded after use.
Checking for Rust
Regularly inspect your grill for signs of rust. If you find any, remove it with a wire brush and apply a rust-resistant paint.
Maintain and clean your smoker by:
- Regularly cleaning the grill grates to prevent buildup.
- Controlling heat well to avoid flare-ups.
- Checking frequently for rust
Proper Disposal
Dispose of waste safely. You can:
- Follow local guidelines for disposing of ash and grease.
- Use protective gloves when cleaning.
- Do not dispose of hot coals.
In summary, a clean smoker is a happy smoker. Taking the time to maintain and clean your converted grill will not only prolong its lifespan but also improve its performance and ensure the quality of your smoked food. Regular cleaning, proper disposal, and timely inspections will help you keep your smoker in top condition for years to come.
| Key Point | Brief Description |
|---|---|
| 🛠️ Conversion Cost | Under $50 for essential parts. |
| 🌡️ Temperature Control | Maintain consistent heat. |
| 🪵 Wood Choice | Different woods for unique flavors. |
| 🍖 Food Variety | Smoke meats, fish, veggies. |
Frequently Asked Questions
Charcoal grills are generally easier to convert because they are already designed to contain smoke. Gas grills can be converted, but may require additional modifications to control airflow and maintain consistent temperatures.
Use a reliable thermometer to monitor the temperature inside the grill. Adjust the vents to control airflow and add or remove charcoal as needed to maintain the desired temperature range, typically between 225°F and 275°F.
The type of wood you use depends on your personal preference and the type of food you’re smoking. Hickory is great for beef and pork, mesquite for grilling, apple for poultry and fish, and cherry for pork and poultry.
Smoking times vary depending on the type and size of the food. Ribs can take 6-8 hours, pork shoulder 8-10 hours, salmon 3-4 hours, and chicken 3-4 hours. Use a meat thermometer to ensure the food is cooked to the proper internal temperature.
Use a smoker box or foil pouch filled with wood chips and place it directly on the gas burners. Alternatively, you can use a cast-iron skillet filled with wood chips. Make sure the chips are close to the heat source.
Conclusion
Converting your standard grill into a smoker is an achievable and budget-friendly project that opens your way to a whole new culinary world. By implementing these simple steps and proven techniques, you’ll be enjoying the rich flavor of smoked foods in no time. Happy smoking!

")


